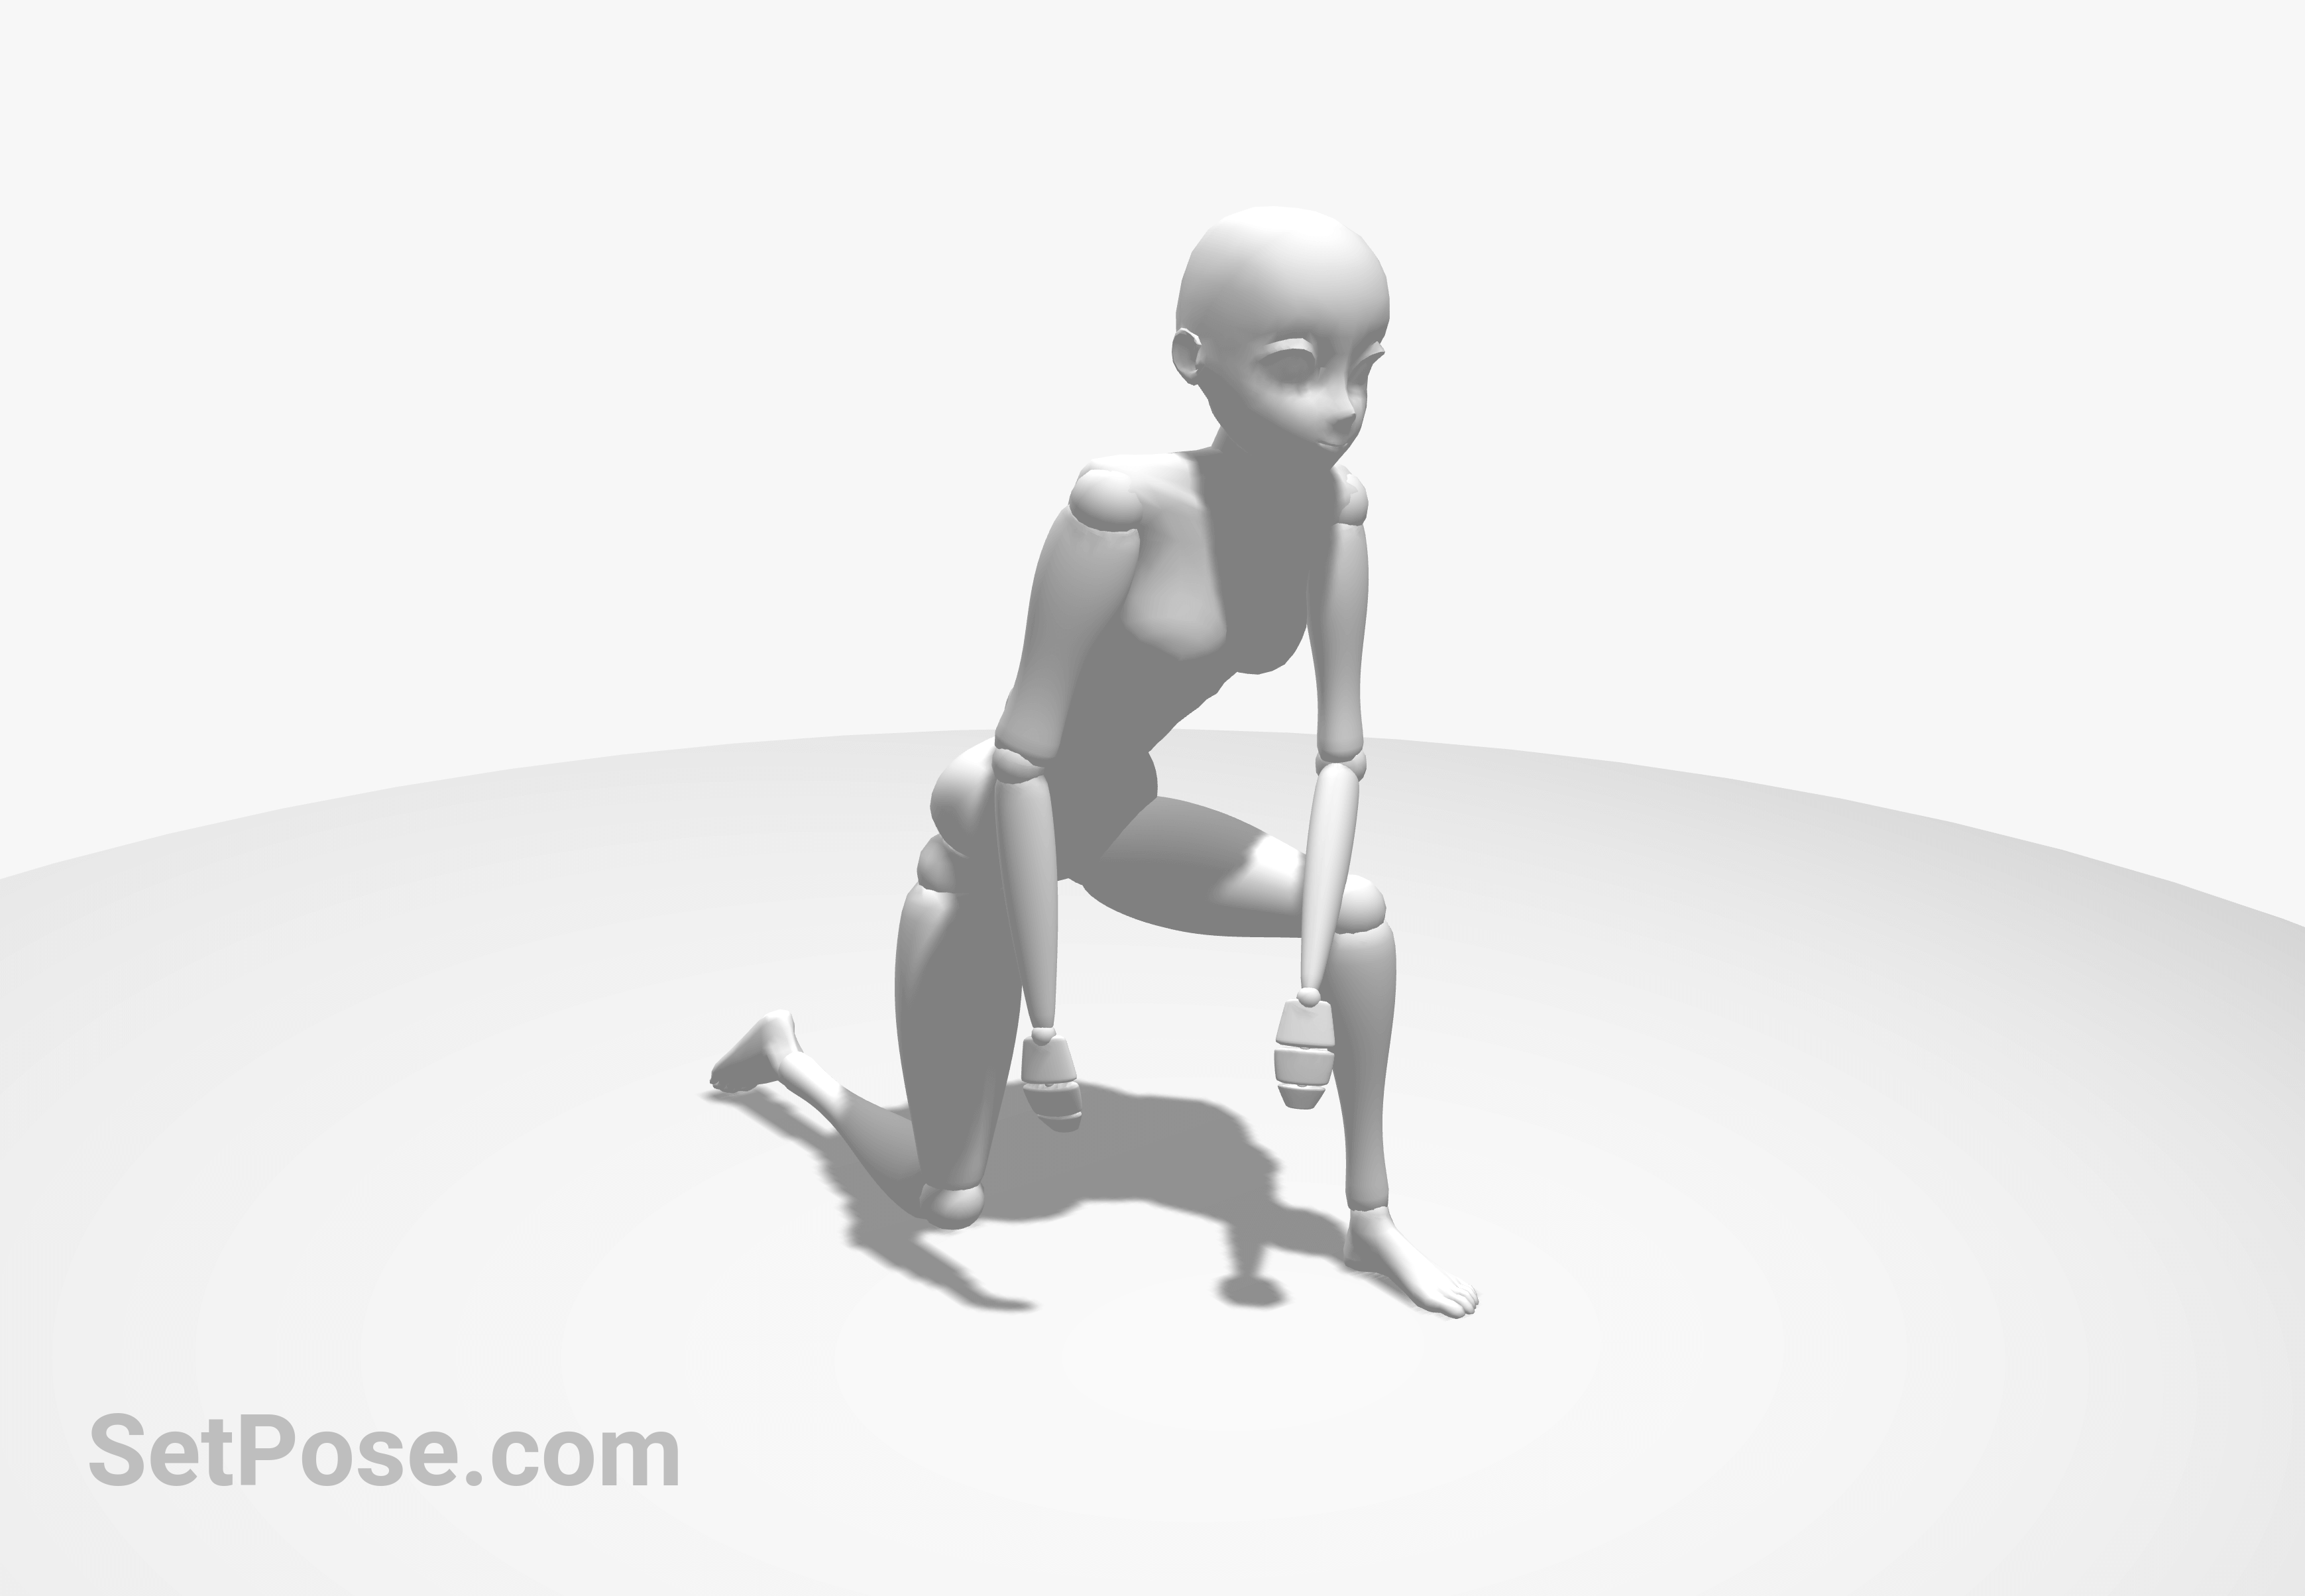
Mastering the mechanics of human anatomy requires reliable visual data, and utilizing a kneeling pose reference is essential for capturing authentic weight distribution, balance, and muscular tension. Whether you are sketching a digital illustration, sculpting a 3D character, or directing a model in a photography studio, understanding how the body interacts with the ground while kneeling elevates the realism of your work. This guide explores the structural anatomy, dynamic variations, and practical execution of kneeling poses to enhance your creative workflow in 2026.
Anatomical Foundations of the Kneeling Pose
A realistic kneeling pose relies heavily on the accurate depiction of skeletal alignment and soft tissue compression. When a human figure kneels, the center of gravity shifts downward, bringing the pelvis closer to the base of support created by the knees, shins, and feet.
Understanding how joints articulate in this position prevents common drawing errors such as floating limbs or distorted proportions. The primary joints involved—the hips, knees, and ankles—undergo extreme flexion that alters the visible surface anatomy.
- Pelvic Tilt and Spine: Depending on whether the subject sits back onto their heels or maintains an upright torso, the lumbar spine will either flex or extend. An upright kneeling posture requires core engagement, causing the erector spinae muscles to contract visibly.
- Patellar Compression: When the knee bears weight against a surface, the patella (kneecap) presses into the underlying fat pads and skin, creating flat surfaces and folds that artists often overlook.
- Ankle Plantarflexion: The foot position drastically changes the silhouette. Pointed toes stretch the instep and expose the tendons of the dorsal foot, while tucked toes create tension in the calf muscles and reveal the plantar arch.
Categorizing Kneeling Poses for Creative Projects
Not all kneeling postures communicate the same narrative or physical strain. Categorizing these references helps you select the appropriate stance for your specific artistic or photographic composition.
Upright Kneeling
In this variation, the torso is perpendicular to the ground, and the body weight rests entirely on the shins and knees. This posture exudes formality, vulnerability, or prayer. The line of action remains vertical, requiring balance along the central axis of the spine and neck.
Low-Lunge or Single-Knee Kneeling
This asymmetric pose features one knee on the ground while the opposite foot is planted flat on the floor, forming a ninety-degree angle at the front knee. It is a dynamic stance frequently used in action photography, fantasy illustrations, and character concept art to suggest readiness for movement or combat.
Seated Kneeling (Seiza Style)
The subject kneels with shins flat on the ground and the glutes resting directly on the heels or the arches of the feet. This position compresses the hamstrings against the calves, creating pronounced bulges in the lower leg musculature and a distinct triangular silhouette from the rear view.
Comparative Analysis of Kneeling Variations
Choosing the right reference depends on the mood, narrative context, and physical stability required for your subject. The following breakdown compares key attributes across the primary kneeling configurations.
| Pose Variation | Primary Weight Distribution | Muscular Tension Focus | Ideal Creative Application |
|---|---|---|---|
| Upright Kneeling | Dual knees and shins | Core, quadriceps, glutes | Formal portraits, spiritual scenes |
| Single-Knee Lunge | Front foot and rear knee | Hip flexors, calves, core | Action shots, dynamic character art |
| Seated Kneeling | Heels, ankles, and shins | Hamstrings, lower back | Calm portraits, meditative studies |
| Wide-Stance Kneel | Knees apart, feet together | Inner thighs, pelvic region | Athletic stances, grounded power poses |
Pro-Tip for Visual Artists Always establish the ground plane first when constructing a kneeling figure from reference. Drawing a solid perspective grid ensures that the contact points—whether they are the knees, shins, or feet—anchor convincingly to the surface without appearing to hover in space.
Step-by-Step Workflow for Utilizing Kneeling References
Integrating visual references into your drawing or photography workflow ensures anatomical accuracy and saves time during the revision phase. Follow this structured approach to maximize the utility of your reference materials.
- Analyze the Silhouette and Balance: Look at the negative space surrounding the figure. Determine whether the center of gravity falls squarely between the contact points or if the pose leans forward to create kinetic energy.
- Block in Major Masses: Sketch the simplified geometric volumes of the head, ribcage, and pelvis before refining individual limbs. Pay close attention to the tilting of the pelvic girdle in asymmetric kneeling postures.
- Map Muscle and Skin Tension: Observe where muscles stretch and where they compress. For instance, the quadriceps will elongate in a lunge, while the calf muscles will flatten against the hamstrings in a seated kneeling position.
- Refine Joints and Folds: Add wrinkles to clothing around the knee joints and check the foreshortening of the lower legs as they recede into the background.
Common Pitfalls and Troubleshooting
Artists and photographers often encounter specific structural challenges when working with kneeling pose references. Recognizing these issues helps maintain anatomical plausibility.
- Incorrect Leg Proportions: A frequent error is making the lower leg appear too short when viewed from a front-facing perspective due to foreshortening miscalculations. Always measure the tibia length relative to the femur.
- Ignoring Surface Interaction: Bodies have weight. If a model kneels on a soft mattress or carpet, the surface must depress visibly beneath their knees. Failing to show this interaction makes the subject look weightless or pasted onto the background.
- Symmetrical Rigidity: Unless drawing a strict formal portrait, avoid total symmetry in limbs. Subtle shifts in shoulder alignment or foot placement inject life and natural asymmetry into the composition.
Frequently Asked Questions
What is the best way to find accurate kneeling pose references?
High-quality anatomical books, 3D pose-able desktop software, and specialized photography stock websites offering multi-angle lighting provide the most reliable visual data for artists. Utilizing a mix of photographic references and structural skeleton models ensures a comprehensive understanding of surface form versus underlying bone structure.
How do I handle severe foreshortening in a kneeling pose?
Break the limbs down into simple cylindrical blocks and use overlapping contours to define spatial depth before adding detailed musculature. Establishing a clear perspective grid prior to sketching prevents the limbs from appearing flat or distorted.
Why do kneeling poses often look stiff in digital art?
Stiffness usually stems from a lack of counter-balancing movement in the spine and shoulders. Introduce a gentle twist in the torso or a tilt in the head to break rigid vertical lines and create organic movement.
How can I make a kneeling figure look like it has actual body weight?
Focus on the points of contact where flesh compresses against the supporting surface, and ensure the torso's mass logically dictates the compression of the core and hip muscles. Adding subtle skin folds and muscle bulging around the joints reinforces physical mass.
Are single-knee kneeling poses anatomically identical for male and female subjects?
While the skeletal mechanics remain consistent, broader shoulder structures in male anatomy and wider pelvic configurations in female anatomy alter the overall weight distribution and hip rotation angles. Adjust your underlying gesture lines to reflect these natural dimorphic traits.
Elevate Your Artistic Accuracy Today
Mastering the mechanics of the human form requires dedication to accurate proportion, weight distribution, and anatomical structure. By leveraging high-quality kneeling pose references and applying rigorous structural analysis to your workflow, you can produce compelling, lifelike artwork and photography. Begin integrating these foundational techniques into your next creative project to achieve professional-grade results.