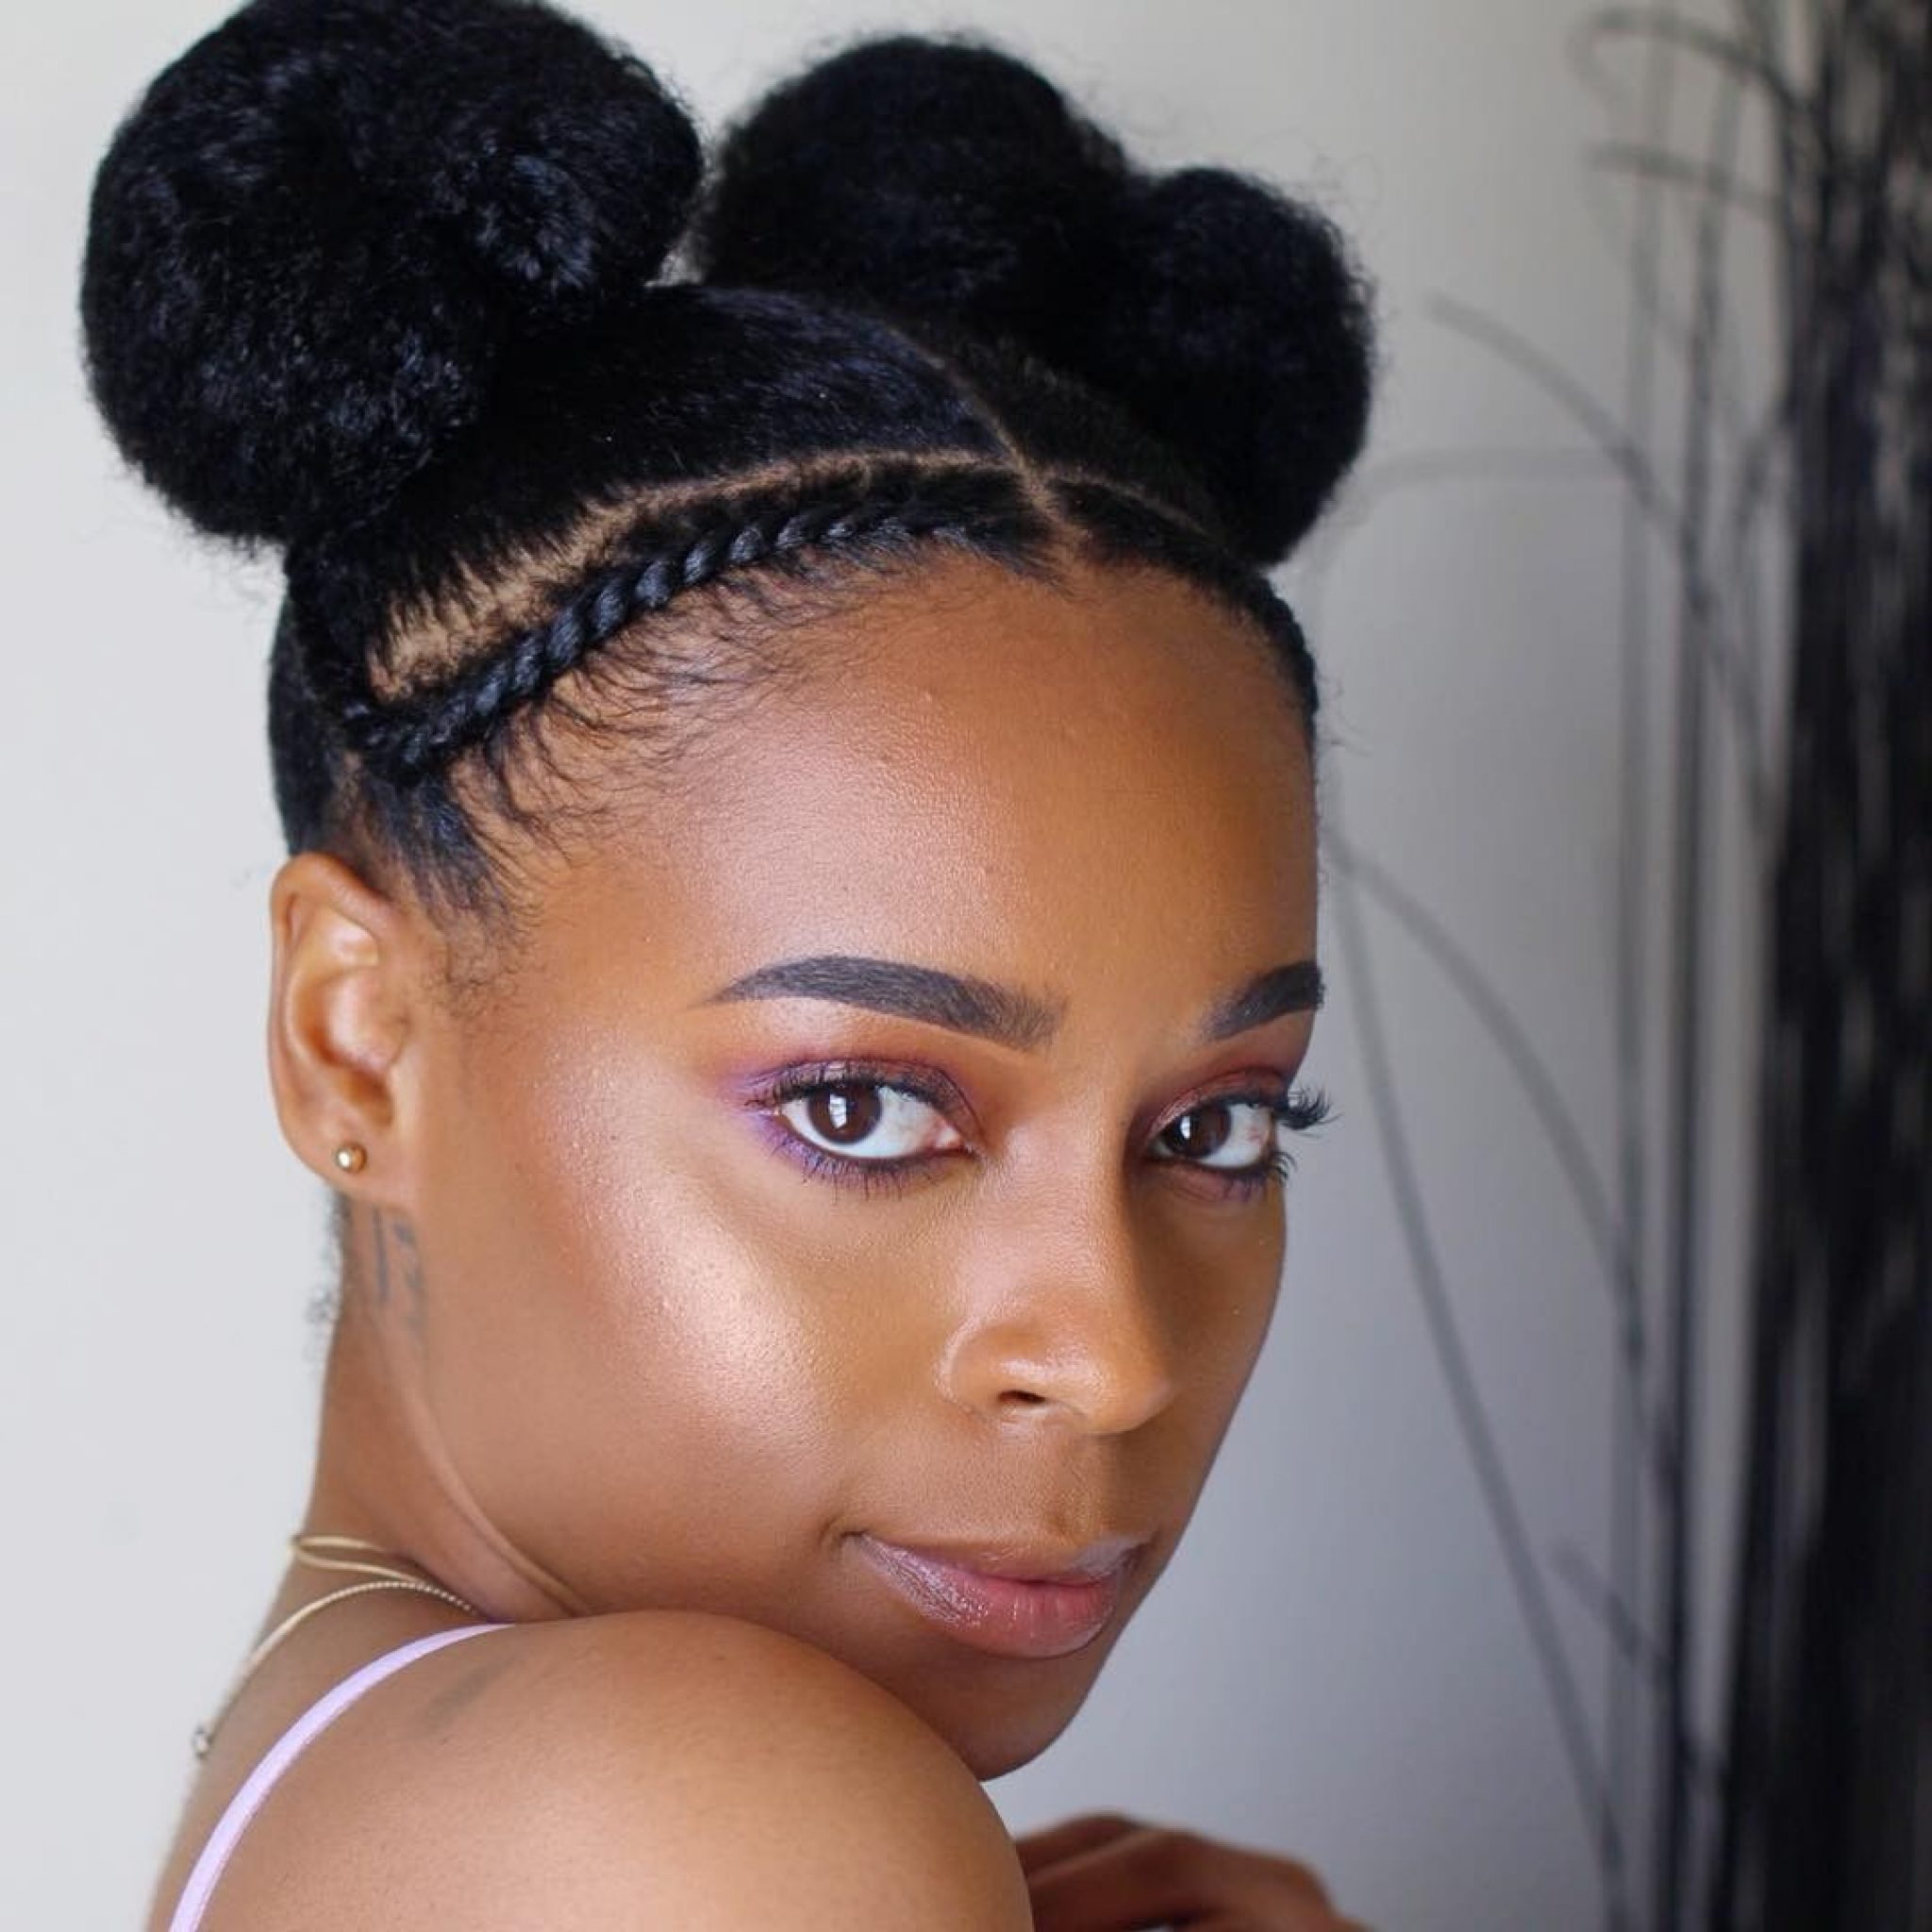
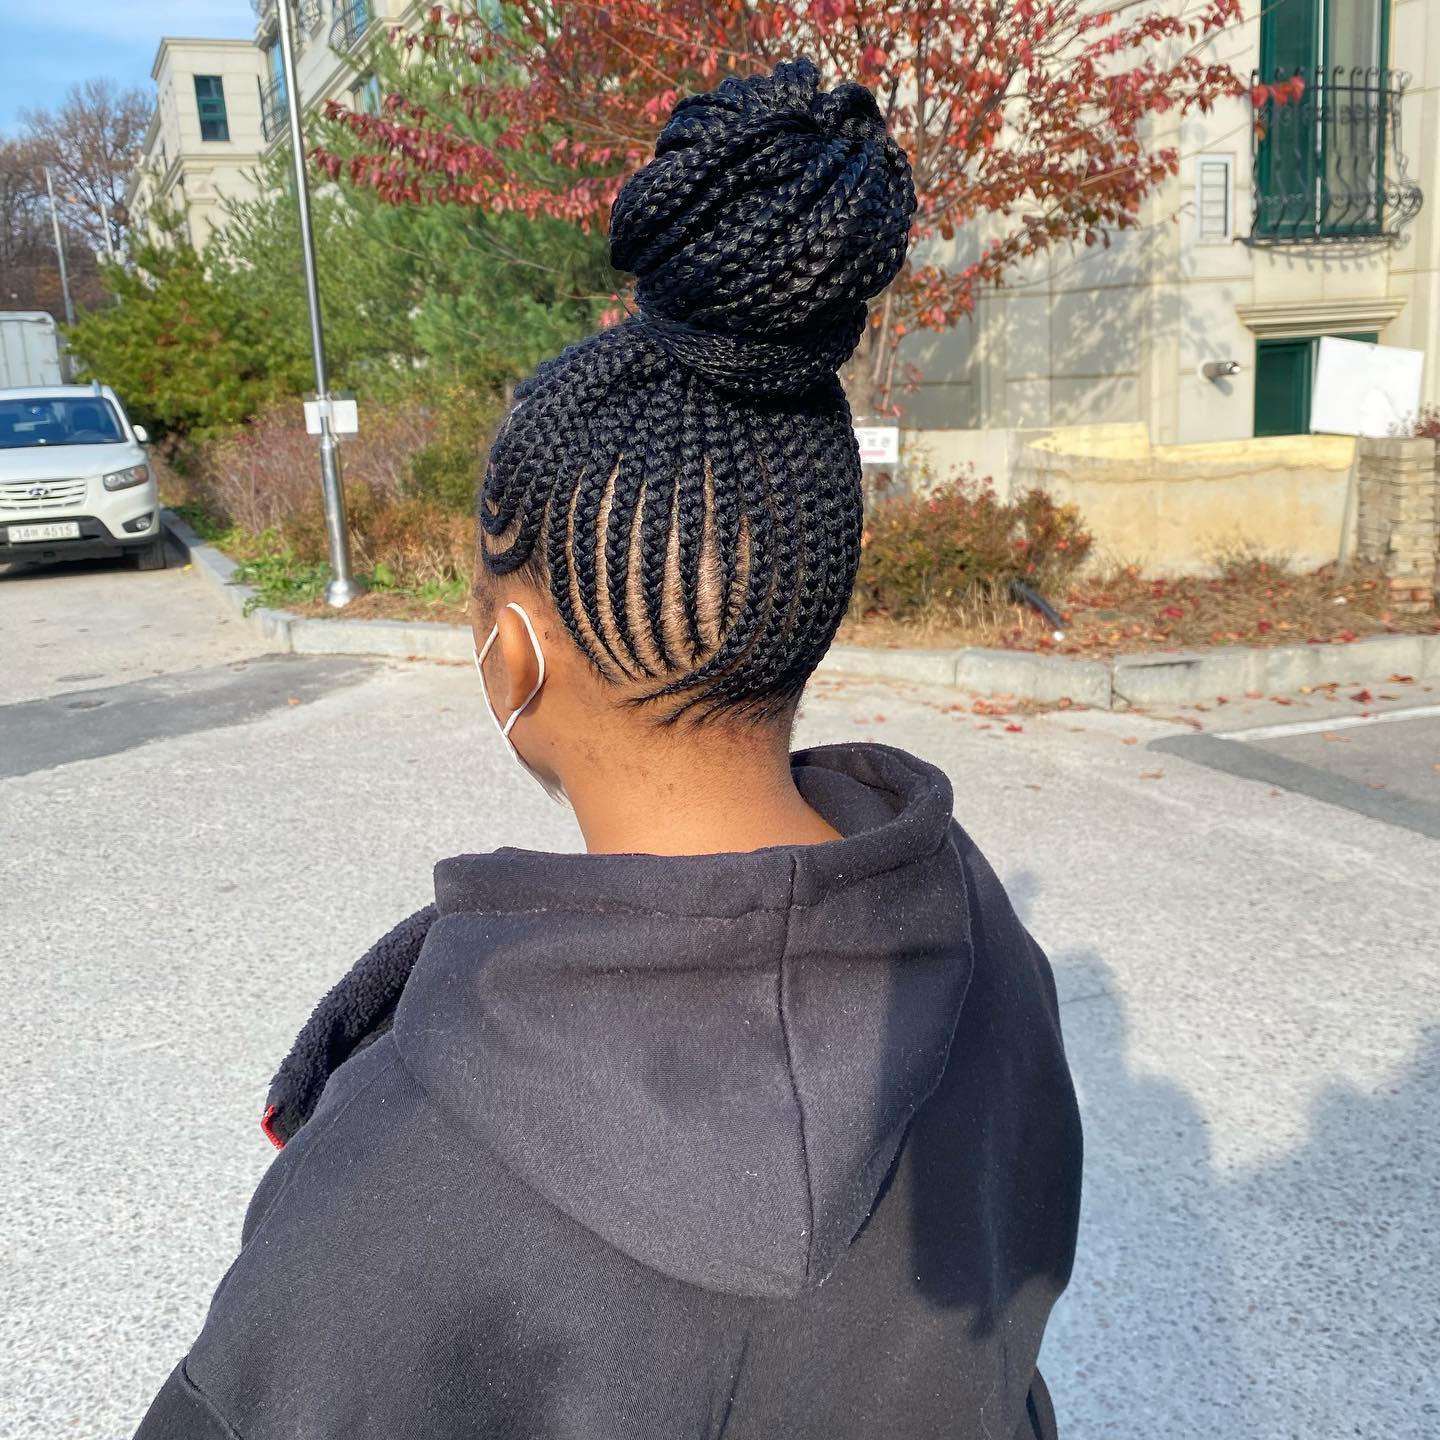
The cornrow bun is a sophisticated protective hairstyle that combines the precision of scalp-integrated braids with the elegance of a gathered updo. By weaving hair flat against the scalp and securing the ends into a bun, this style provides exceptional hair protection, reduces daily manipulation, and maintains a polished appearance for several weeks.
In 2026, the cornrow bun remains a staple in the natural hair community and the fashion world alike. Whether you are looking for a professional look for the office, a low-maintenance style for a vacation, or a way to protect your ends while growing out your natural texture, the cornrow bun offers unparalleled versatility. This guide explores the technical requirements, the step-by-step installation process, and the essential maintenance routines needed to keep your braids looking fresh and your scalp healthy.
The Evolution and Purpose of the Cornrow Bun
The cornrow bun is more than just a convenient way to keep hair off the face; it is a structural technique that distributes the weight of the hair evenly across the scalp. Unlike a simple ponytail or a loose bun, which can place significant tension on the hairline (edges), cornrows anchor the hair in a way that minimizes breakage when executed correctly.
Historically, cornrows have served as a cultural signifier and a practical necessity for managing textured hair. In its modern 2026 iteration, the cornrow bun has evolved through the "feed-in" technique—a method where extensions are added gradually to the braid to create a seamless, natural-looking transition from the forehead to the bun. This prevents the bulky "knots" at the start of the braid that were common in older braiding styles, resulting in a sleeker, more refined silhouette.
Essential Prerequisites: Preparing the Hair and Scalp
The longevity and safety of a cornrow bun depend entirely on the state of the hair before the first braid is even started. Because the hair will be tucked away for two to six weeks, it is vital to ensure it is clean, hydrated, and strong.
Scalp Health and Cleansing
Begin with a clarifying shampoo to remove any buildup from oils, waxes, or previous styling products. A clean scalp is less likely to itch during the duration of the style. Following the shampoo, a deep conditioning treatment is non-negotiable. This step reinforces the hair shaft with moisture and proteins, preparing it for the tension of braiding.
The Drying Process
For the smoothest results, many stylists recommend braiding on "stretched" hair. This can be achieved through blow-drying with a comb attachment on low heat or using heatless stretching methods like African threading or large twists. Stretched hair allows for cleaner parting and prevents the internal tangling that can occur when curly or coily hair is braided in its shrunken state.
Required Tools and Materials
To achieve a professional-grade cornrow bun in 2026, you will need the following inventory:
- Rat-tail Comb: Essential for creating precise, sharp parts.
- Edge Control or Braiding Wax: Used to smooth down flyaways and keep the parts looking crisp.
- Pre-stretched Braiding Hair: Usually synthetic (Kanekalon) or treated human hair, used to add volume and length to the bun.
- Hair Ties and Bobby Pins: For securing the gathered braids into the final bun shape.
- Leave-in Conditioner and Scalp Oil: To provide a moisture barrier before braiding.
Diverse Styles of Cornrow Buns
While the basic concept remains the same, the geometry of the parts and the placement of the bun can completely transform the look.
1. The Classic High Top-Knot
This is perhaps the most popular version. The cornrows are braided from the entire perimeter of the head toward the crown. This style elongates the neck and provides a "face-lift" effect. It is particularly effective for formal events or high-intensity athletic activities where you want the hair completely out of the way.
2. The Low Chignon Cornrow Bun
For a more understated and professional look, the braids are directed toward the nape of the neck. This style is often preferred by those who find high buns too heavy or those who wear hats and headgear frequently. The low bun is also easier on the edges, as the gravity of the bun pulls downward rather than backward.
3. Spiral and Zig-Zag Patterns
In 2026, geometric creativity is at its peak. Instead of straight back rows, stylists often use curved or spiral parting. This adds an artistic element to the style and can be used to camouflage areas of thinning hair or to create the illusion of more volume.
4. Goddess Cornrow Buns
Goddess braids are thicker, chunkier cornrows. They take less time to install but generally have a shorter lifespan than smaller braids. A goddess cornrow bun is a bold statement and is often adorned with hair jewelry, such as gold cuffs or rings, to enhance the "goddess" aesthetic.
Technical Comparison of Cornrow Bun Variations
| Feature | Small Feed-in Bun | Jumbo/Goddess Bun | Natural Hair Bun (No Extensions) |
|---|---|---|---|
| Install Time | 4–6 Hours | 1.5–2.5 Hours | 1–2 Hours |
| Longevity | 4–6 Weeks | 1–2 Weeks | 1 Week |
| Scalp Tension | Moderate | High (due to weight) | Low |
| Best For | Long-term protection | Special events | Short-term styling |
| Complexity | High | Medium | Low |
Step-by-Step Installation Guide
Achieving a clean cornrow bun requires patience and a steady hand. If you are doing this at home or instructing a stylist, follow these structural steps.
Step 1: Sectioning and Mapping
The secret to a symmetrical bun is the "anchor" point. Decide exactly where the bun will sit (high, medium, or low). Use your rat-tail comb to create a circular or square section around that point. All other braids will feed into this center. Divide the rest of the hair into the number of braids you desire. Generally, 8 to 12 braids are standard for a medium-density look.
Step 2: The Braiding Process
Apply a small amount of braiding wax to the part lines to ensure they are crisp. Start braiding at the hairline. If using the feed-in method, start with your natural hair for the first two or three turns, then gradually add thin strips of extensions under the braid. This ensures the braid starts small and grows in diameter as it moves toward the bun, mimicking natural hair growth.
Step 3: Directing the Braids
Ensure every braid is angled directly toward the anchor point. If a braid is skewed, it will create a "pucker" in the scalp once the hair is gathered, which can lead to discomfort and unsightly bumps.
Step 4: Gathering and Securing
Once all the cornrows are completed, you will have several "tails" of braids hanging from the anchor point. Secure these tails together with a sturdy, snag-free hair elastic.
Step 5: Forming the Bun
Wrap the braided tails around the base of the elastic. You can create a "doughnut" shape for a classic look or a "braided knot" for more texture. Use bobby pins to secure the ends of the braids tucked underneath the bun. Avoid using too many pins, as they can dig into the scalp; four to six well-placed pins are usually sufficient.
Professional Maintenance and Longevity
A cornrow bun can stay looking "fresh from the salon" for weeks if maintained with the right routine. Without proper care, the hair can become frizzy, and the scalp can develop dandruff or inflammation.
The Nighttime Routine
Friction is the enemy of cornrows. Every night, you must wrap your hair in a silk or satin scarf. For a cornrow bun, a "bonnet" is often better than a flat scarf because it accommodates the volume of the bun without squashing it. The smooth fabric prevents the braids from rubbing against cotton pillowcases, which can strip moisture and cause "fuzziness."
Scalp Hydration
Since your scalp is exposed, it needs targeted hydration. Avoid heavy greases that clog pores. Instead, use a lightweight oil (like jojoba or almond oil) or a specialized scalp serum containing tea tree oil or peppermint to soothe any itching. Apply these products directly to the parts using an applicator bottle.
Managing Frizz and "New Growth"
As your natural hair grows, the braids will naturally loosen at the roots. In 2026, many people use a "braid sheen spray" or a light mousse to lay down flyaways. Apply the mousse over the braids, wrap your head with a silk scarf for 15 minutes, and then blow-dry on a cool setting to "reset" the style.
Critical Warnings: Tension and Traction Alopecia
The most significant risk associated with cornrow buns is traction alopecia—hair loss caused by localized, repetitive tension on the hair follicles. According to the American Academy of Dermatology, hairstyles that pull constantly on the scalp can cause permanent damage to the follicles.
Signs your cornrow bun is too tight:
- You have a headache immediately after styling.
- Small white bumps (folliculitis) appear along the hairline.
- The skin around your forehead or temples feels "pulled" or tight.
- You cannot close your eyes or smile comfortably.
If you experience these symptoms, the braids must be loosened or removed. No hairstyle is worth permanent hair loss. Always prioritize the health of your edges over the "neatness" of the style.
Frequently Asked Questions
How long does a cornrow bun typically last?
A well-installed cornrow bun with extensions can last between 4 to 6 weeks. However, the duration depends on your hair texture and how well you protect it at night. Natural hair cornrow buns without extensions usually last about 1 week before the frizz becomes prominent. It is recommended not to exceed 6 weeks to avoid matting and buildup at the roots.
Can I wash my hair while it is in a cornrow bun?
Yes, you can wash your scalp, but you must be gentle. Use a diluted shampoo or a "root rinse" and apply it directly to the scalp between the braids. Rinse thoroughly and ensure the base of the braids is completely dry—using a hooded dryer or a blow-dryer is essential—to prevent "braid funk" or mildew from trapped moisture within the bun.
Is the cornrow bun suitable for all hair types?
While cornrows are traditionally a technique for curly and coily textures (Types 3 and 4), they can be performed on straighter hair types. However, straight hair lacks the natural "grip" of textured hair, so the braids may slip or become frizzy much faster. Stylists often use more product or specific "underhand" braiding techniques to compensate for this.
How do I prevent the bun from feeling too heavy?
The weight of a cornrow bun usually comes from the extensions. To reduce weight, ask your stylist to use the feed-in method with lightweight, pre-stretched hair. You can also opt for a "hollow bun" where a mesh doughnut is used as a base, and fewer braids are wrapped around it to create the illusion of fullness without the actual weight of the hair.
What should I do if my scalp starts itching?
Itching is often a sign of dryness or a reaction to the chemicals used on synthetic braiding hair. You can soothe the scalp with a mixture of water and apple cider vinegar or a specialized anti-itch braid spray. If the itching is accompanied by a rash, you may be allergic to the synthetic fibers and should remove the style.
Final Recommendations
The cornrow bun is a premier choice for anyone seeking a blend of elegance and protection. To achieve the best results in 2026, focus on the preparation phase: ensure your hair is deeply moisturized and your scalp is healthy before you begin. Choose a stylist who understands tension management to protect your hairline, and never ignore signs of discomfort.
For your next action, schedule a consultation with a professional braider to discuss which parting pattern best suits your face shape and hair density. By following a strict nighttime routine and keeping your scalp hydrated, your cornrow bun will remain a stunning, low-maintenance asset to your personal style.